Tag Archives: Node.js

Continuous Functional Test Automation with Gulp, Mocha, Request, Cheerio, Chai

In this post, I have shown how to build a platform-agnostic, continuous server-side functional test automation infrastructure that can test just about any website regardless of the server (eg. IIS/Apache) hosted, application platform (eg. ASP.NET/Java/Python/what not) and operating systems (eg. Windows/Linux) used, on & off Azure, using JavaScript which is the most open scripting language on this planet now, obviously all powered by Node.js. I hope to cover more advanced testing scenarios in future posts.

One of the most essential parts of a web application lifecycle management is test automation. You must watch out for code breaks. Especially when the app goes big and complex and when all you ever want to do is coding or focusing on solving problems, you really don’t want to test code manually. This is a waste of time and productivity. But, we are programmers and we want our test code to test our code. In this post, I have shown how you can perform server-side functional tests least but not limited to testing DOM values, etc., without launching a browser, however, though it will not be able to test client-side functionalities. I have covered a bit of Gulp, Mocha, Request, and Cheerio in order to perform functional tests on a Node.js app. It’s important to note that we’re not going to test code, rather test the functionality of our app, and at the same time, similar results if not better can be achieved by record/write & replay using Selenium as well, and there’re more eg. PhantomJs/Zombie.js, but that I might cover in future posts.

Overview of the modules

  1. Gulp is a build system, which will assist in running the test code as part of the build. It can watch for file changes and trigger test automatically. Popular equivalent of Gulp is is Grunt. There’re various reasons why I prefer Gulp over Grunt, which is outside the scope of this post.
  2. Mocha is a test framework, which gives the instruments we need to test our code. Popular alternative to Mocha is Jasmine.
  3. Request is one of the most popular module that can handle HTTP request/response.
  4. Cheerio is a cool module that can give you a DOM from HTML as string.
  5. Chai is a fine assert module.

Execute the following instructions to install Gulp and Mocha into the app:

npm i mocha gulp gulp-mocha gulp-util -g
npm i mocha gulp gulp-mocha gulp-util --save

The web app to test

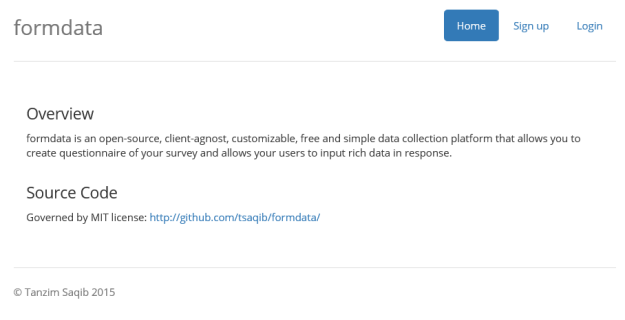
Consider a simple Express + Node.js app that we’re putting under test, which has a few buttons and clicking on them will navigate to relevant pages. If no such page is found, a Not Found page will be displayed.

formdata

We’ll test whether the page loads properly with the expected text in the body, and clicking on Signup and Login redirect user to respective pages.

Setting up Mocha

Mocha’s expectation is that we create a ‘test’ folder and keep all the tests there. I have gone ahead and created another folder inside of ‘test’ called ‘functional.’ Now that I am going to test the home page of the app, I have also created a file called home.js where our test code related to testing the home page will reside. I have written the following code there:

process.env.NODE_ENV = 'test';

describe('Home page', function () {
    it('should load the page properly');
    it('should navigate to login');
    it('should navigate to sign up');
    it('should load analytics');
});

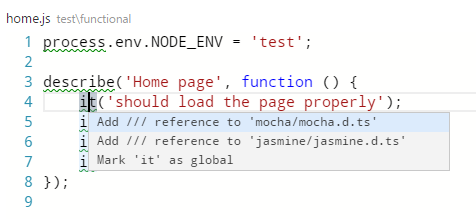
Here’s another reason why I love Visual Studio Code so much, because it allows me resolve the dependencies just like below:

VSCode

I have gone ahead and chosen the first choice, which has resulted into this:

process.env.NODE_ENV = 'test';

describe('Home page', function () {
    it('should load the page properly');
    it('should navigate to login');
    it('should navigate to sign up');
    it('should load analytics');
});

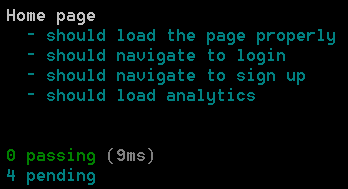
Visual Studio Code has included the type definition of the references we are using, and referred inside the .js file. I have indicated NODE_ENV an app-wide constant to inform that we’re currently in test mode, which is often useful inside the app code to determine the current running mode. More on that might be covered in future posts. Mocha facilitates us in writing specs in describe-it way. Consider these as placeholders for now, as we will look into it in a while. For now, lets say, these are our specs and we want to integrate into our build system. Now if I execute “mocha test/functional/home.js” the test will run as expected:

Mocha

That’s not convenient, especially when you will have many test code and which may possibly reside inside various folder structures. In other words, we want it to run recursively. We can achieve just that, by creating a file test\mocha.opt with the following parameters as content:

--reporter spec
--recursive

Now if you execute mocha you will find the same results as previous. If you have noticed I have specified a reporter here called ‘spec’ – you can also try with nyan, progress, dot, list and what not in order to change the way Mocha reports test results. I like spec, because it gives me Behavior Driven Development (BDD) flavor.

Integrating with Gulp

Now that we have a test framework running, we’d like to include this as part of the build process, which can even report us of code breaks during development time. In order to do that lets go ahead and create a gulpfile.js at the root with the following contents:

var gulp = require('gulp');
var mocha = require('gulp-mocha');
var util = require('gulp-util');

gulp.task('test', function () {
    return gulp.src(['test/**/*.js'], { read: false })
        .pipe(mocha({ reporter: 'spec' }))
        .on('error', util.log);
});

gulp.task('watch-test, function () {
    gulp.watch(['views/**', 'public/**', 'app.js', 'framework/**', 'test/**'], ['test']);
});

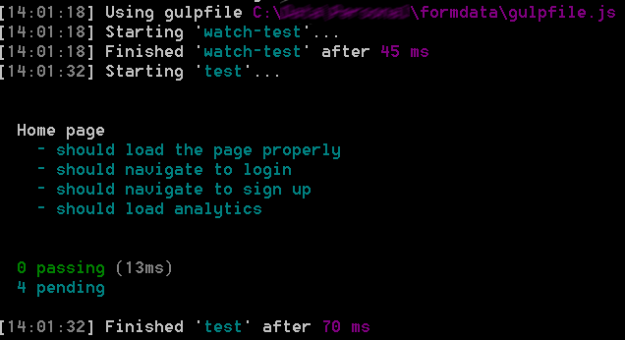
Gulp is essentially a task runner. It can run defined tasks. If ‘gulp’ command is executed, it will search for ‘default’ task and execute that. Since, we didn’t declare any ‘default’ task, rather ‘test’ task, we need to specify the task name as parameter, for example, ‘gulp test’ on the command line in order to achieve the same result that we did with mocha. Second task that we have defined, with the name ‘watch-test’ watches out for the folders that I have specified here, views, public and test for file changes, if it finds any, it automatically run the ‘test’ task and report the test results. I have also included app.js which is my main Node.js file, and framework folder, where I like to put all my Node.js code. Lets go ahead execute the following:

gulp watch-test

Now if you make any change to any files located in the paths above, you will see something similar to the following:

Gulp

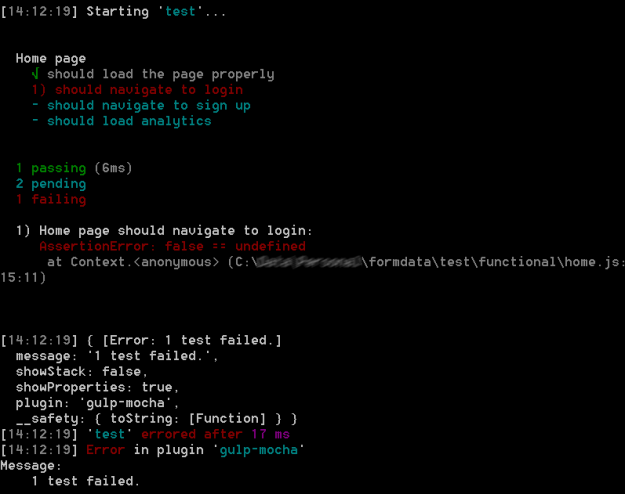
As you can see all of our tests are still pending, lets go ahead and write some tests on our setup now. We need to refer back to the test/functional/home.js file. Let us implement two simple tests, first one to succeed, and the latter to fail. I’m using Node’s assert module here to report satisfied/unsatisfied conditions.

var assert = require('assert');
process.env.NODE_ENV = 'test';

describe('Home page', function () {
	it('should load the page properly', function()
		{
			assert.ok(true);
		});

	it('should navigate to login', function()
		{
			assert.equal(2 == 4);
		});

	it('should navigate to sign up');
	it('should load analytics');
});

This should ideally result in the following:

Gulp2

Testing functionality with Request, Cheerio, Chai

Now that we’re set with the test infrastructure, let us write our specification to “actually” test the functionality. Unlike PhantomJs/Zombie.js, we are not going to change a lot of the way we have learned to write tests as of now and also it won’t require any external libraries/runtime/frameworks, eg. Python. It will also not require us to go through test framework version management nightmares. Lets go ahead and install a few more Node.js modules:

npm i request cheerio chai -g
npm i request cheerio chai --save

If you ever get to work with PhantomJs/Zombie.js/Selenium, you will see in how many places you need to change code in order to get your test code up and running. I have built this test infrastructure in order to remove all such pain and streamline the process. The only place I have to change is the test/functional/home.js file, and the rest will play along nicely.

process.env.NODE_ENV = 'test';

var request = require('request'),
	s = require('string'),
	cheerio = require('cheerio'),
	expect = require('chai').expect,
	baseUrl = 'http://localhost:3000';

describe('Home page', function () {
	it('should load properly', function (done) {
		request(baseUrl, function (error, response, body) {
			expect(error).to.be.not.ok;
			expect(response).to.be.not.a('undefined');
			expect(response.statusCode).to.be.equal(200);

			var $ = cheerio.load(body);
			var footerText = $('footer p').html();
			expect(s(footerText).contains('Tanzim') && s(footerText).contains('Saqib')).to.be.ok;
			done();
		});
	});

	it('should navigate to login', function (done) {
		request(baseUrl + '/login', function (error, response, body) {
			expect(error).to.be.not.ok;
			expect(response).to.be.not.a('undefined');
			expect(response.statusCode).to.be.equal(200);
			expect(s(body).contains('Not Found')).to.be.not.ok;
			done();
		});
	});

	it('should navigate to signup', function (done) {
		request(baseUrl + '/signup', function (error, response, body) {
			expect(error).to.be.not.ok;
			expect(response).to.be.not.a('undefined');
			expect(response.statusCode).to.be.equal(200);
			expect(s(body).contains('Not Found')).to.be.not.ok;
			done();
		});
	});
});

The code here is quite self-explanatory. I have used Request module to GET different paths of my website. I have checked for HTTP response code and if there was any error. I have used jQuery-like DOM manipulation to retrieve resulting HTML, and also used another nice module called string in order to check the string values. Cheerio was used to very conveniently load a DOM from the resulting HTML that was returned in response. And, they were all reported via chai library using “expect” flavor.

How to run it

Running it is also quite easy. Just run our application, in this case, my app is written in Node.js:

npm start

And, in another console/command prompt, run the test:

gulp test

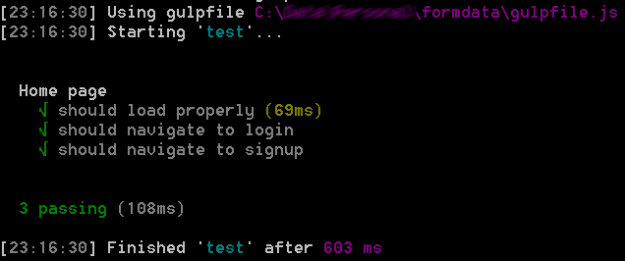
Here’s the test results now:

Final

Source code

I will try to continue building this project and here’s the github address: https://github.com/tsaqib/formdata and live demo is here: http://formdata.azurewebsites.net.
First few tweaks to default Express app

Every time I create a new Express app, I make sure a few changes to fit my need. In this post, I will focus on starting from scratch on fundamentals towards publishing to Azure.

First of all I create a Node.js app, and install Express.

npm init
npm i --save express
express app-name

To run, simply execute:

npm start

My viewpoint on view engines

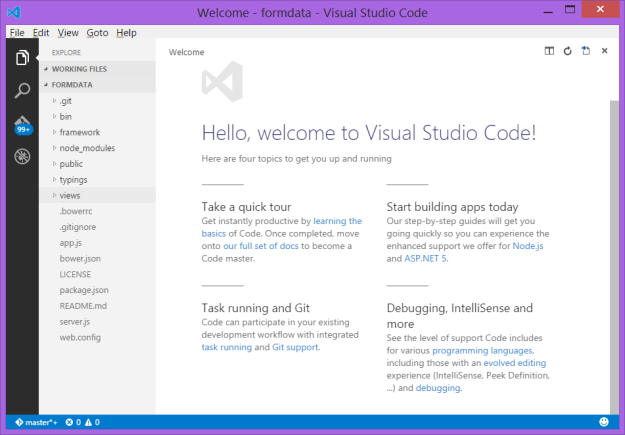
I don’t like Jade view engine or any other view engines for that matter in Node.js apps, because to me it’s a overkill, plus there’s not a great deal of tooling support in many cases. I use Visual Studio Code which I think the best slickified code editor I have ever used as I previously have used Brackets and Sublime. Visual Studio Code has the support for super cool Emmet snippets, which allows you to generate tons of HTML code by using simple CSS expressions, although I don’t spend whole day writing a lot of HTML. Here’s an example:

html>head>title{formdata : collect data on all devices}^>body>div.container>div.header

The above CSS expression will generate the following HTML:

<html>
<head>
	<title>formdata : collect data on all devices</title>
</head>
<body>
	<div class="container">
		<div class="header"></div>
	</div>
</body>
</html>

This is not the best example to showcase the true power of Emmet snippets, but you get the idea.

VS Code

Getting rid of the default Jade view engine

I have removed all views/*.jade files and created an index.html instead, and then executed the following to install the ejs view engine instead:

npm i --save ejs

And now I’ve replaced the following line in the index.js / app.js:

app.set('view engine', 'jade');

With the following:

app.engine('html', require('ejs').renderFile);
app.set('view engine', 'html');

Moving routing to another file

The main (index.js/app.js/whatever) js file becomes crowdy very quickly. Therefore, it’s always a best practice to move out the routing code to some other file. I have created framework/routes.js file and moved all the routing code including error handlers like below:

module.exports = function(app)
{
  app.get('/', function(req, res, next) {
    res.render('index', { title: 'Hello World.' });
  });  

  // catch 404 and forward to error handler
  app.use(function(req, res, next) {
    var err = new Error('Not Found');
    err.status = 404;
    res.render('error', {
      message: err.message,
      error: err
    });
    next(err);
  });

  // error handlers
  // development error handler
  // will print stacktrace
  if (app.get('env') === 'development') {
    app.use(function(err, req, res, next) {
      res.status(err.status || 500);
      res.render('error', {
        message: err.message,
        error: err
      });
    });
  }

  // production error handler
  // no stacktraces leaked to user
  app.use(function(err, req, res, next) {
    res.status(err.status || 500);
    res.render('error', {
      message: err.message,
      error: {}
    });
  });
};

Now that the routing code is moved, we need to tell the app where to look up once an URL request comes up to the server. That’s a single line hooking:

require('./framework/routes')(app);

Making Bower to work inside public folder

By default, when Bower is installed, bower_components folder will be created at the same level as node_modules which makes it useless for the views, because for the views to use bower_components, it needs to live inside public/views folder. Obviously, bower_components are static resources, therefore, it’s only right to keep it inside public folder because they need no server-side processing. Assuming that Bower was installed and initialized like below:

npm i --save bower
bower init

Now that we have a bower.json file created which is essentially the configuration file for the bower, ignore this. Lets create another file called .bowerrc where we can tell Bower to point to the right folder where we want it to install the components with the following contents, in this case:

{
      "directory": "public/bower_components"
}

Now go ahead and install bootstrap:

bower install bootstrap

You will notice that the bootstrap component was installed inside public folder, now you can go ahead and refer to these resources from your views.

Making it run on Azure

It’s often a painful experience partially due to lack of documentation on how to make Node.js apps run on Azure. You have written a perfectly alright Node.js app and your expectation is that it would run as-is after deploying to Azure, but it wouldn’t. Often times, you will end up with this annoying and at the same time frustrating message: “The resource you are looking for has been removed, had its name changed, or is temporarily unavailable.” or some other HTTP 500 error message. However, there’s a blessing in it. Because it has failed and I will be covering the solution in a bit, it opens up a door to configure Node.js apps in even more ways. Lets take a look.

IIS hosted on Azure has this IIS module installed called iisnode, which facilitates the Node.js runtime. Azure also offers ASP.NET style web.config file to configure a Node.js app. I have created such web.config file and pointed that our entry point for the app should be a server.js file. The following is the web.config which essentially tells IIS to let server.js handle all the dynamic requests and handle the static resources as they are. This contains ton of configurations as comments which you can enable/disable as you see fit for your need:

<!--
     This configuration file is required if iisnode is used to run node processes behind
     IIS or IIS Express.  For more information, visit:

     https://github.com/tjanczuk/iisnode/blob/master/src/samples/configuration/web.config
-->

<configuration>
     <system.webServer>
          <handlers>
               <!-- indicates that the app.js file is a node.js application to be handled by the iisnode module -->
               <add name="iisnode" path="server.js" verb="*" modules="iisnode"/>
          </handlers>
          <rewrite>
               <rules>

                    <!-- Don't interfere with requests for node-inspector debugging -->
                    <rule name="NodeInspector" patternSyntax="ECMAScript" stopProcessing="true">
                        <match url="^server.js\/debug[\/]?" />
                    </rule>

                    <!-- First we consider whether the incoming URL matches a physical file in the /public folder -->
                    <rule name="StaticContent">
                         <action type="Rewrite" url="public{REQUEST_URI}"/>
                    </rule>

                    <!-- All other URLs are mapped to the Node.js application entry point -->
                    <rule name="DynamicContent">
                         <conditions>
                              <add input="{REQUEST_FILENAME}" matchType="IsFile" negate="True"/>
                         </conditions>
                         <action type="Rewrite" url="server.js"/>
                    </rule>

               </rules>
          </rewrite>
          <!-- You can control how Node is hosted within IIS using the following options -->
        <!--<iisnode
          node_env="%node_env%"
          nodeProcessCommandLine="&quot;%programfiles%\nodejs\node.exe&quot;"
          nodeProcessCountPerApplication="1"
          maxConcurrentRequestsPerProcess="1024"
          maxNamedPipeConnectionRetry="3"
          namedPipeConnectionRetryDelay="2000"
          maxNamedPipeConnectionPoolSize="512"
          maxNamedPipePooledConnectionAge="30000"
          asyncCompletionThreadCount="0"
          initialRequestBufferSize="4096"
          maxRequestBufferSize="65536"
          watchedFiles="*.js"
          uncFileChangesPollingInterval="5000"
          gracefulShutdownTimeout="60000"
          loggingEnabled="true"
          logDirectoryNameSuffix="logs"
          debuggingEnabled="true"
          debuggerPortRange="5058-6058"
          debuggerPathSegment="debug"
          maxLogFileSizeInKB="128"
          appendToExistingLog="false"
          logFileFlushInterval="5000"
          devErrorsEnabled="true"
          flushResponse="false"
          enableXFF="false"
          promoteServerVars=""
         />-->
        <iisnode watchedFiles="*.js;node_modules\*;routes\*.js;views\*.jade"/>
     </system.webServer>
</configuration>

The contents of server.js is extremely simple:

require('./bin/www');

It simply redirects the request to Express. Do you recall when Express was installed it also created a bin/www file where it does the server-side infrastructure handling?

CRUD with CouchDB in Node.js

I started working with database management systems with FoxPro 2.6 which seemed back in the days extremely powerful to me, until 2000 when I learned MySQL, which was a true relational database management system. Then 1-year on Oracle, and then for the rest of my life from 2005 I worked on SQL Server.

When I was approaching MEAN stack, obviously MongoDB was a natural choice, but due to coming from a RDBMS background, I was into more RDBMS sort of production deployment style of a NoSQL database. Ensuring security of MongoDB on production seemed to me a nightmare, or perhaps I was simply too lazy to find a more convenient way out. I just wanted to implement old-school user/pass authentication way of securing a public database. Apache CouchDB does just that. Another selling point to me was that CouchDB exposes a true REST endpoint, which feels even more natural to me especially since I was approaching the *EAN stack.

Last, but not least, tell me Windows has spoiled me over the years, but I still rely more on a dashboard/admin control panel of a database than command-line, not that you can do everything from the dashboard though and still a lot of the things you need to do executing cURLs/code, etc. Therefore, I embraced CouchDB.

Installing on Desktop

Installing Apache CouchDB is fairly simple. Just go ahead and download a Windows installer (.exe). When it’s finished install it. That’s it. It is important to have it installed in your dev machine in order to make it convenient for you to write your code against.

Installing on Azure

There are several ways you can approach this. You can download and install it on your own Windows/Linux VM and configure the ports. Here are the ports configuration: public ports (5984, 6984) and Local ports (5984, 6984).

Perhaps if you’re lazy like me, you would choose a pre-configured Azure VM at the VM Depot here. For this particular post, I am going to choose CouchDB on Ubuntu. You can easily follow along the instruction and get started with deploying to your Azure account.

1464_1_030AF84E

Here are the steps:

  1. Download Publish settings of your Azure account, by visiting this. If asked provide with your login information of the account that’s associated with Microsoft Azure.
  2. Visit the CouchDB on Ubuntu VM at VM Depot here.
  3. Click on Create Virtual Machine, and if it asks you to login, do so using your Microsoft Account associated with Azure. Provide with basic information and also keep the user and password handy.
  4. It will then ask you to drag and drop the Publish settings file that you have downloaded in Step 1. Do that. It will take nearly 30 minutes to complete configuring the VM to be used.

Configuring CouchDB

Now that the CouchDB is installed, rest of the configuration setups are all the same. You will be given a dashboard to setup your database. Depending on your installation you may access it via the following links:

Lets go ahead and quickly check the CouchDB installation by navigating to http://localhost:5984/, and you will likely to receive a JSON response similar to the following:

{"couchdb":"Welcome","uuid":"cad5a00c59c76086cb65d7bf6391f3b7","version":"1.6.1","vendor":{"version":"1.6.1","name":"The Apache Software Foundation"}}

Connecting to the database from Command Prompt via HTTP

There’s a nice little tool called cURL, which allows you to connect internet via HTTP and other protocols, and it’s a free and open software. I am going to show how we can use this tool to connect to our database from Command Prompt. I have used this particular installer. curl command will be available by elevating Command Prompt, with Administrator Privileges. Let us see an example:

curl tanzimsaqib.com

This command will open up my website and print out the HTML on the console. As you can guess, the next command we will try is the following:

curl http://localhost:5984

As you can imagine, that will print out the JSON response we have seen earlier. Now let’s securely connect to Couch with any of the users created above, eg. either admin or the regular testuser:

curl http://testuser:testpassword@localhost:5984/

Securing CouchDB

By default, CouchDB is completely open and exposed to http://your-dns-name-here.cloudapp.net:5984/ or for local computer http://localhost:5984/ as stated above. Anyone can go ahead, use the dashboard and delete all databases without asking for any credential whatsoever. Therefore, you must create an admin to secure the database because once your database is up on the public cloud, it’s accessible to everybody.For example: in order to create a new database, you can always go to Databases tab and click Add New Database. Really anyone can go ahead and check out the rows without needing to login at all. Go to http://your-dns-name-here.cloudapp.net:5984/_utils/fauxton/#createAdmin and create an admin immediately, and of course store the user/password pair.

1680_2_780388A7

Now that we have secured the basic administration privileges of CouchDB, yet your databases are still exposed. For example: in order to create a new database, you can always go to Databases tab and click Add New Database. Really anyone can go ahead and check out the rows without needing to login at all.

3806_4_2CEFCC3E

Creating a database user

I will switch back to the traditional dashboard now, so you get to see how similar both the dashboards are. Go to _users table by navigating to http://your-dns-name-here.cloudapp.net:5984/_utils/database.html?_users, so that you may click on “New Document.” Complete a document like so and “Save Document” it:

4621_CouchDBnewuser_100E597C

Do not worry about your password – it won’t be saved in clear text. Once you have saved, you will be able to see the following screen which indicates that your password was encrypted before it was saved – voila! You’ve a secure database now:

3404_CouchDBnewuser2_3A137906

Creating the first database

Lets go ahead and create our first database. Like I have mentioned above CouchDB exposes a true REST endpoint, we can create a database from Command Prompt:

curl -X PUT http://localhost:5984/testdb

You will get the following response, which means you need to authenticate with a proper user to create a database:

{"error":"unauthorized","reason":"You are not a server admin."}

Here is how you can create a new database named testdb:

curl -X PUT http://youradminuser:youradminpassword@localhost:5984/testdb

Here’s a response of a successful CouchDB operation:

{"ok":true}

Once you would like to specify a HTTP Method, you have to use –X in the curl command. Here, because we were creating a new database we have specified PUT method. By the way, you can always create and manage database from the dashboard.

Securing a database

General principle of CouchDB is that databases are public unless you specify an user and its permission level to the database. Here’s how you can do it. Open your database and click “Security…” which will bring up the following screen. Go ahead and input the newly created username so that this user can get access to that database:

4331_7_4924F915


When you are going to create and update design documents later on, you would need an user to authenticate against and execute the operation, hence often times, it’s better to put Admins and Members with the same Names and Roles. eg. same values in the text fields.

Accessing the Linux VM

Remember, at the beginning you have completed a pair of user/password for your Linux VM which we haven’t used yet. We can connect to the VM using a terminal environment and for that I use PuTTY. It’s a nice little tool and it gets the job done. Put your DNS name there and Open:

5707_5_353FA33C

It will then launch a terminal window where you can put that user/password pair and logon to your Linux VM:

5076_6_603F4354

Accessing from Node.js

This is the point from where you will start to pull out your hairs. There are couple popular middlewares namely nano and cradle that enable your applications to talk to CouchDB from Node.js, but there are tradeoffs, personal opinions, API design choices and in some cases inadequate documentation influence your decision, but there’s no reason why I have chosen nano. These libraries essentially makes the REST API calls to CouchDB under the hood, giving us syntactic sugar so that we can be more productive. On the other hand, ideally you should be using one of the nice frameworks such as express/sails as well, but I am showing in a barebones Node.js program how you can access CouchDB database.

Writing the first Node.js application

Here’s a hello world Node.js application which if you point browser to http://localhost:8000 it will say Hello World. Fair enough.

 
var http = require('http'); 
var server = http.createServer(function (request, response) { 
	response.writeHead(200, { "Content-Type": "text/plain" }); 
	response.end("Hello World\n"); 
}); 

server.listen(8000); 
console.log("Server running at http://127.0.0.1:8000/"); 

Here’s how you can run a Node.js application. If you have saved the file as app.js, you can execute node app.js.

Installing & Setting up nano

Execute the following command to install nano into your application:

npm i --save nano

Lets create a database from code:

 
var nano = require("nano")("http://localhost:5984"); 
var http = require("http"); var server = http.createServer(function (request, response) { 
	nano.db.create("mylibrary", function (err, body, header) { 
		if (err) { 
			response.writeHead(500, { "Content-Type": "text/plain" }); 
			response.end("Database creation failed. " + err + "\n"); 
		} else { 
			response.writeHead(200, { "Content-Type": "text/plain" }); 
			response.end("Database created. Response: " + JSON.stringify(body) + "\n"); 
		} 
	}); 
}); 

server.listen(8000); 
console.log("Server running at http://127.0.0.1:8000/");

As you can see here we are referring to the nano library and initializing with the connection string to the CouchDB server. Later on we have attempted to create a mylibrary database and if we point to the browser it will show as below:

Database creation failed. Error: You are not a server admin.

What would we need to make it a success? Yes, you’ve guessed it right. We need a way to authenticate first in order to execute such operation. Just go ahead and change the top line and it would work:

 
var nano = require('nano')('http://youradminuser:youradminpassword@localhost:5984'); 

Now run again, and you will find the following output in the browser:

Database created. Response: {"ok":true}

Inserting a new object

Consider CouchDB databases a dictionary where you can put a value against a key, popularly known as key-value pair (KVP). Databases are also sometimes referred to document store, because they store JSON documents. All our documents are fully JavaScript qualified JSON objects. The following code creates a book object, and stores it with ISBN as its key, so that next time we query for the book with the ISBN, it will be able to identify and retrieve the object (in this case book) for us.

 
var nano = require("nano")("http://youradminuser:youradminpassword@localhost:5984"); 
var http = require("http"); 
var server = http.createServer(function (request, response) { 
	var book = { 
		Title: "A Brief History of Time", 
		Author: "Stephen Hawking", 
		Type: "Paperback – Unabridged, September 1, 1998", 
		ISBN: "978-0553380163" 
	}; 
	
	nano.use("mylibrary").insert(book, book.ISBN, function(err, body, header) { 
		if(err) { 
			response.writeHead(500, { "Content-Type": "text/plain" }); 
			response.end("Inserting book failed. " + err + "\n"); 
		} else { 
			response.writeHead(200, { "Content-Type": "text/plain" }); 
			response.end("Book inserted. Response: " + JSON.stringify(body) + "\n"); 
		} 
	}); 
}); 

server.listen(8000); 
console.log("Server running at http://127.0.0.1:8000/"); 

Now if you take a look at the dashboard, and drill down to the database you will be able to see the object that you’ve just inserted:

Untitled

Note that an extra _rev field is there which keeps track of the revisions of the documents. Every time you will update this document, it will increment the _rev field.

Querying for an object

Welcome to the concept of design documents. Design documents are special documents that contain application code. There’s no direct command/operation for querying an object in CouchDB. We must write a design document which consists of Map and Reduce (optional) functions in order to retrieve our desired documents, and store that design document into the CouchDB database, so that the query may run inside the CouchDB engine. Such design documents are called views. MapReduce has been quite a popular application model for processing fairly large datasets. You specify a map function that processes all KVPs to generate an intermediate KVPs, and reduce function merges all intermediate values with the same intermediate keys. You will find excellent resources online (here’s one), hence I am not going to spend much time on this here. However, for this post, I will focus on only map functions.

Uploading a design document

Lets go ahead and create the following file called mylibrary.json:

 
{ 
	"_id": "_design/mylibrary", 
	"language": "javascript", 
	"views": { 
		"books_by_isbn": { 
			"map": "function (doc) { if(doc.ISBN) { emit (doc.ISBN, doc); } }" 
		} 
	} 
} 

And now execute the following command to upload the view:

curl -X PUT http://youradminuser:youradminpassword@localhost:5984/mylibrary/_design/mylibrary -d @mylibrary.json

If you take a look at the books_by_isbn view that we have written, CouchDB will execute this function for each document and will try to match whether the document has ISBN field. For those documents which are satisfying this criteria will be returned to the application code, in this case, in ISBN as keys and documents as values via in-built emit method.

Updating an existing design document

It’s mandatory to download the latest design document first in order to make changes and upload again, otherwise _rev will mismatch, and there will be a conflict situation. In order to download the latest design document, you may want to execute the following:

curl http://youradminuser:youradminpassword@localhost:5984/mylibrary/_design/my
library > mylibrary.json

You can maintain design documents from the dashboard as well.

Querying a view

Now that we have uploaded the code for books_by_isbn view, lets take a look how we can call use the view from Node.js:

 
var mylib = require("nano")("http://localhost:5984").use("mylibrary") 
var http = require("http"); var server = http.createServer(function (request, response) { 
	var isbn = "978-0553380163"; mylib.view("mylibrary", "books_by_isbn", function (err, body, header) { 
		if (err) { 
			response.writeHead(500, { "Content-Type": "text/plain" }); 
			response.end("Querying books failed. " + err + "\n"); } 
		else { 
			response.writeHead(200, { "Content-Type": "text/plain" }); 
			response.end("Books queried. Response: " + JSON.stringify(body) + "\n"); 
		} 
	}); 
}); 

server.listen(8000); 
console.log("Server running at http://127.0.0.1:8000/"); 

This will return all the books with ISBN property defined.

Books queried. Response: {"total_rows":1,"offset":0,"rows":[{"id":"978-0553380163","key":"978-0553380163","value":{"_id":"978-0553380163","_rev":"1-31ff552cb5824faf270e35ba8d6c6c02","Title":"A Brief History of Time","Author":"Stephen Hawking","Type":"Paperback  – Unabridged, September 1, 1998","ISBN":"978-0553380163"}}]}

If you look at the generated JSON, you can clearly see that the body.row actually holds the collection of the books. If you would like to iterate through them, you can. For example, if you’d like to access title of any book, you may use: body.rows[i].Title.

Querying for an object by ID

The example below in the updating an object demonstrates how to get an object by its ID.

Updating an object

Lets remove all the error handling code and simplify the code above a bit. In this example, I have obtained the book object first by the ISBN property, and then just made a plain insert after I have changed the author from Stephen Hawking to Tanzim Saqib. This will make a revision to the object and next time we will do ‘get’ again, we will get the latest revision:

 
var isbn = "978-0553380163"; 
mylib.view("mylibrary", "books_by_isbn", function (err, body, header) { 
	mylib.get(isbn, function (error, existing) { 
		if (!error) { 
			existing.Author = "Tanzim Saqib"; 
			mylib.insert(existing, isbn, function (err, body, header) { 
				if (!err) { 
					response.writeHead(200, { "Content-Type": "text/plain" }); 
					response.end("Book updated. Response: " + JSON.stringify(body) + "\n"); 
				} 
			}) 
		} 
	}); 
});

CouchDB revisions are beyond the scope of this post. Perhaps someday I will address that at length.

Deleting an object

Deleting an object is rather straight forward. The only change in the code above is a new method called ‘destroy’. All previously destroyed revisions remain in the Couch, unless you do a “Compact & Cleanup” operation on the dashboard.

var isbn = "978-0553380163";
mylib.view("mylibrary", "books_by_isbn", function (err, body, header) {
	mylib.get(isbn, function (error, existing) {
		if (!error) {
			mylib.destroy(isbn, existing._rev, function (err, body, header) {
				if (!error) {
					response.writeHead(200, { "Content-Type": "text/plain" });
					response.end("Book deleted. Response: " + JSON.stringify(body) + "\n");
				}
			})
		}
	});
});

Conclusion

In one post, I have attempted to pinpoint every single possible detail to get you started with CouchDB on Azure environment while working in Node.js.